I can't believe how fast this year went by. We already started the new year and I'm very excited about it. Every time a year finishes is a good moment to look back at the year and learn from your mistakes, remember the good things and forget about the bad or sad events. 2011 was by far the best year because we welcomed our little Zaide to our family. This happy baby (she literally smiles almost all day) has brought so much joy to our home. I also had the luck that my mom arrived just in time for her birth and my dad and family in law came shortly after and spent some wonderful days with us.
Business wise I can't complain. I surpassed the 500 sales in one of my jewelry shops and 200 in the cufflinks shop, plus all the local, website and Facebook sales, so basically there are more than 1,000 people who wear an Estylo Jewelry item all over the world. I also have over 1,000 admirers of my shop and more than 2,300 Facebook Fans. Wow, I can't even believe how good this year was. A huge thanks to all my loyal return customers that support my business day after day. These are my best seller crystal jewelry pieces.
There are also more than 200 brides that chose my jewelry for their special day. It's so flattering every time I get a bridal order, just to know that they had so many options but decided to wear one of my creations for their wedding. Some weddings were just filled of my jewelry, since they ordered for the bride, mother, mother in law, bridesmaids and flower girls. And of course don't forget about the groom and the best men, they had their custom cufflinks as well. Thank you so much!
But now lets look forward, what's awaiting for Estylo Jewelry in 2012? Lots of new designs for sure! Given that I have so many personalized requests I decided to expand my business offering personalized hand stamped jewelry. Currently it's only available for Facebook Fans, but I will be adding them slowly to my shops.
As for men, I had to stop custom orders for cufflinks because of my pregnancy and now the birth of my daughter, since the process with the resin is toxic. Well, the good news is that after researching other alternatives and trying a few different out I found a great substitution and will start offering them in my shop around mid January. See for yourself how great they look!
Ok everyone, I looked back and discovered so many great things that happened this year and now I welcome 2012 and hope it will be even better. Thank you to everyone who supported me during 2011 and I wish all of you a Happy New Year!!!
Showing posts with label Handmade Jewelry. Show all posts
Sunday, January 1, 2012
Wednesday, July 13, 2011
2,000 Facebook Fans Celebration Giveaway
I just hit the 2,000 Facebook Fans mark and as promised I want to celebrate with all my fans! If you're not a fan yet, don't worry, you can "Like" my page and join us in the celebration with this amazing Giveaway that I've prepared. Last time, when I got to 1,000 Fans I gave away 1 prize, however this time I'm thinking on giving 5 prizes away! Basically, this will be my biggest Giveaway ever and also the last one I will be having for a few months. So now is your opportunity to participate!
What I'm giving Away:
1st. Prize - Any One Item* from my Jewelry Shop + Any One Item* from my Cufflinks Shop + 1 Flower Headband or Hairclip.
2nd Prize - Any One Item* from my Jewelry Shop OR Any One Item* from my Cufflinks Shop + 1 Flower Headband or Hairclip.
3rd to 5th Prize - 1 Flower Headband or Hairclip
*Custom items are not included.
Who will get the Prizes:
1st. Prize - The winner of this prize will be chosen via Random.org on Sunday, July 24th 2011 from the people who entered the giveaway by commenting on this blog post (please see the How to enter and Rules section).
2nd. Prize - This prize will be given to the person who referred the 1st. prize winner to my Giveaway via Facebook. That means that if you shared this giveaway on your Facebook and a friend of yours got to my giveaway because of that link and won the 1st prize, then you will get the 2nd prize. This is a way to Thank You for sharing with your friends. If the 1st prize winner was not referred by anyone then the winner of the 2nd prize will be chosen by Random.org on Sunday, July 24th 2011.
3rd to 5th Prize - This will be more fun. I will post 3 questions on my Facebook Wall and the first person to answer the question correctly will win one prize.
How to Enter for 1st and 2nd Prize:
As seen on CashNet Sweepstakes and http://bloggiveawaydirectory.com
What I'm giving Away:
1st. Prize - Any One Item* from my Jewelry Shop + Any One Item* from my Cufflinks Shop + 1 Flower Headband or Hairclip.
2nd Prize - Any One Item* from my Jewelry Shop OR Any One Item* from my Cufflinks Shop + 1 Flower Headband or Hairclip.
3rd to 5th Prize - 1 Flower Headband or Hairclip
*Custom items are not included.
Who will get the Prizes:
1st. Prize - The winner of this prize will be chosen via Random.org on Sunday, July 24th 2011 from the people who entered the giveaway by commenting on this blog post (please see the How to enter and Rules section).
2nd. Prize - This prize will be given to the person who referred the 1st. prize winner to my Giveaway via Facebook. That means that if you shared this giveaway on your Facebook and a friend of yours got to my giveaway because of that link and won the 1st prize, then you will get the 2nd prize. This is a way to Thank You for sharing with your friends. If the 1st prize winner was not referred by anyone then the winner of the 2nd prize will be chosen by Random.org on Sunday, July 24th 2011.
3rd to 5th Prize - This will be more fun. I will post 3 questions on my Facebook Wall and the first person to answer the question correctly will win one prize.
How to Enter for 1st and 2nd Prize:
There is One Mandatory Entry and Six other Optional for you to increase your chances of winning. (All entries must be made as a comment on this blog post ....please make sure to do separate comments for each entry)
Mandatory Entry:
- "Like" my Facebook Fan Page and then come back and comment on my blog that you did. If you are a fan already you still have to comment that on my blog.
Optional Entries:
- Share this blog post on Facebook and comment on my blog that you did, including the link you shared. Remember that this will give you the option to win the 2nd Prize!
- Leave a Comment here on my blog telling me which Jewelry item from my Jewelry Shop you would choose if you win.
- Leave a Comment here on my blog telling me which Cufflinks from my Cufflinks Shop you would choose if you win.
- Follow my blog and leave a comment that you do so.
- Stumble this blog post and leave a comment on my blog that you did.
- Tweet about this blog post and comment on my blog that you did. My Twitter is @estylojewelry
You have a total of Seven Chances to Enter, so take advantage of them!
Rules:
The Giveaway starts today July 13, 2011 and ends on July 23, 2011 at 11:59 pm PST. Winner will be chosen via Random.org and will be announced on my Blog and Facebook Fan Page the following day. It is open Worldwide for anyone 18 years or older. The prize will be sent out via USPS First Class. Please note that I can't be responsible for Post Office mistakes or non-deliverable. Winner will have 3 days to contact me for the prize or a new winner will be chosen.
Good Luck Everyone!!!
This Giveaway is now Closed! The winner of the 1st prize is Comment #69 from Kajira. Congratulations! Please contact me for your prize! She was referred by a link posted by Aileen, which therefore gets the 2nd prize :)
As for prizes 3 to 5 they were already shipped to the lucky winners stated on my Facebook Page.
As seen on CashNet Sweepstakes and http://bloggiveawaydirectory.com
Labels:
accesories,
cufflinks,
flowers,
Giveaway,
Handmade Jewelry
Wednesday, May 18, 2011
Beach Wedding Ideas
Lately I've noticed that I'm getting more and more Beach Jewelry requests from my customers. As the summer gets closer brides are preparing for their big day and looking for beach themed items. For me here in the SF Bay Area I really don't feel the summer being close since it's still cold and rainy, but I know that other places are already filled with sun and warm weather.
So I made a quick search and found tons of info for beach weddings. I personally love weddings outdoors and especially on the beach. The only part that I don't love is that sometimes it can be really hot, so make sure you have big umbrellas or tents so that the guests are not all the time exposed to the sun. A good way to refresh your guests is offering them frozen Margarita drinks or similar. I normally love strawberry daiquiris or tamarind margaritas...yummy!
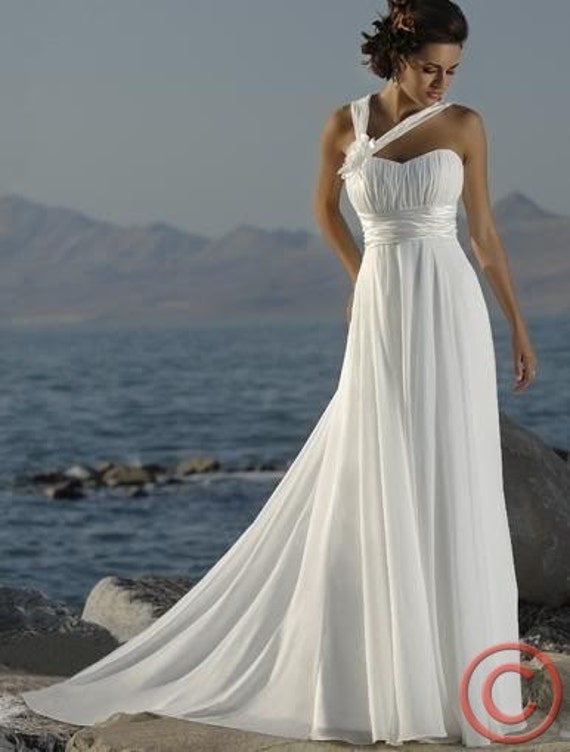
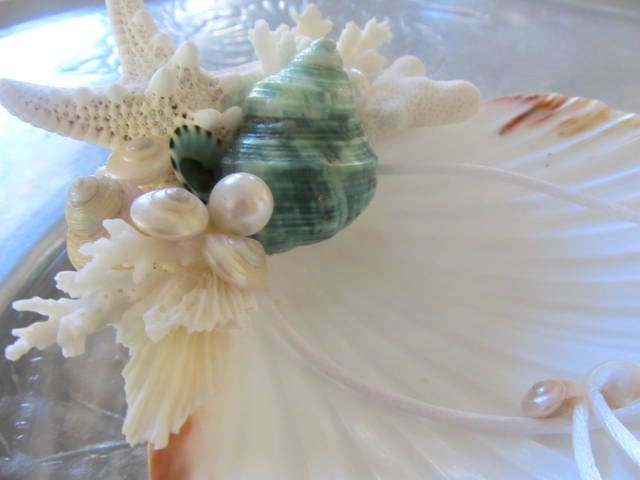
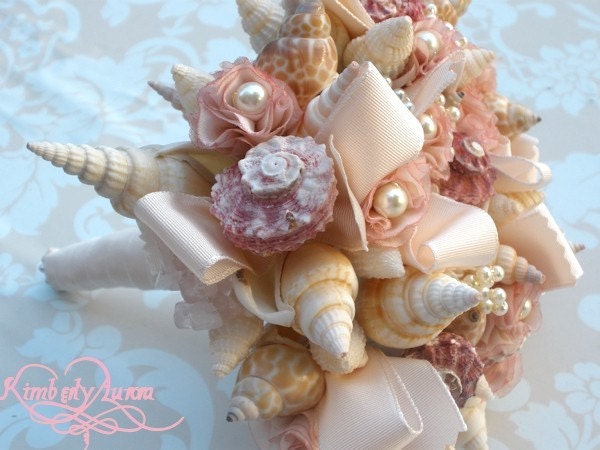
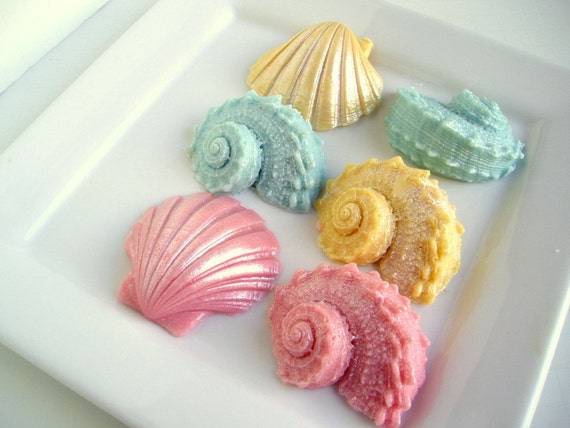
Here are a few ideas for your Handmade Beach Wedding. I've included the link to the vendors so you can go check out their shops as well.
So I made a quick search and found tons of info for beach weddings. I personally love weddings outdoors and especially on the beach. The only part that I don't love is that sometimes it can be really hot, so make sure you have big umbrellas or tents so that the guests are not all the time exposed to the sun. A good way to refresh your guests is offering them frozen Margarita drinks or similar. I normally love strawberry daiquiris or tamarind margaritas...yummy!
Here are a few ideas for your Handmade Beach Wedding. I've included the link to the vendors so you can go check out their shops as well.
Edible Sugar Fan Coral here
Handmade Chiffon Bridal Dress here
Handmade Personalized Heart Tags here
Handmade White Flip Flops here
Ring Bearer Shell here
Handmade Beach Bridal Bouquet here
Beach soap Favors here
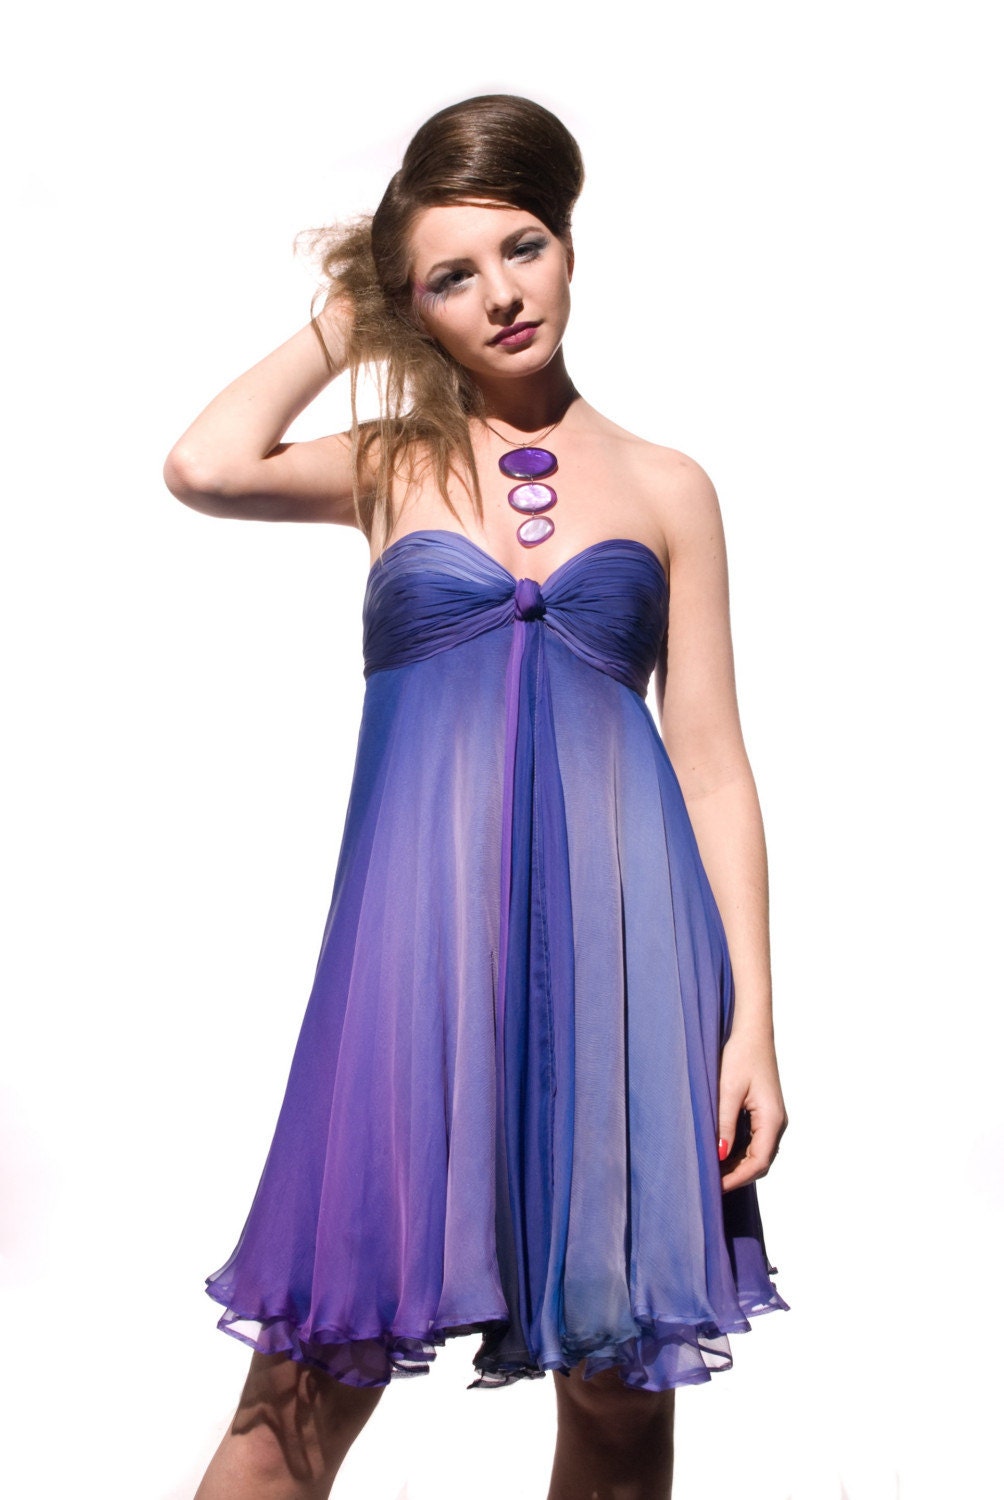
Handmade Purple Bridesmaids Chiffon dress here
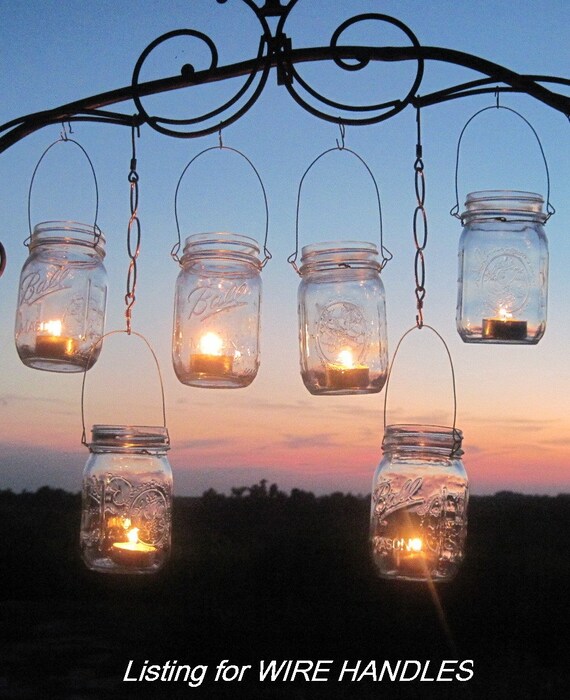
And for the brides that like some DIY items I found this great lanterns. You can buy the wire hooks online on Etsy and then re-use or buy the glass jars. Just place tea candles into the jar and the attach the wire holders. That's it! Very easy to make and it looks great!
DIY Lantern Jar holders here
I will be looking for more ideas and then show them to you in my next post. Meanwhile just a quick note, I've already finished my Beach Jewelry collection and started posting a few of them in my shop. I will be adding some pictures on my Facebook so you can see them there as well and remember that there is always a secret coupon for my Estylo Jewelry Facebook Fans!!!
Labels:
Beach Wedding,
DIY,
Handamde,
Handmade Jewelry,
Summer wedding
Saturday, May 7, 2011
Make Your Own Bridesmaid Flower Jewelry Set - Tutorial Part II
Last week I posted Part I of the Bridesmaid Jewelry Tutorial. I hope you had enough time to get your supplies and start gluing the flowers. Remember that the flowers need to dry at least 24 hours in order to set well. Also be careful when handling the E6000 glue since it has a very strong smell and can be toxic. So make sure you always work on a well ventilated area and read the instructions on the tube before opening.
So lets continue working on this beautiful set. We'll be making this Necklace now:
Take one Glass Pearl and slide it onto an Eye pin. Next we’ll do a simple loop into the remainder of the pin. Grab the eye pin and with the other hand use the round nose pliers. Place the pliers at the top of the pin; make sure you don’t use the biggest part of the pliers, since it will make your loop too big. Now begin rolling the wire towards the beads until the end of the wire meets the other end of the loop. If you didn’t calculate right you can cut the excess of the wire end keep rolling in, or re-try doing the loop.
Now do the same with the remaining pearls and pins. Once you have the pearls on the eye pins attach one to the other and close the loops except for the two in the outside. Next cut the chain into equal parts and slide one chain on every side of the pearls and close the loops.
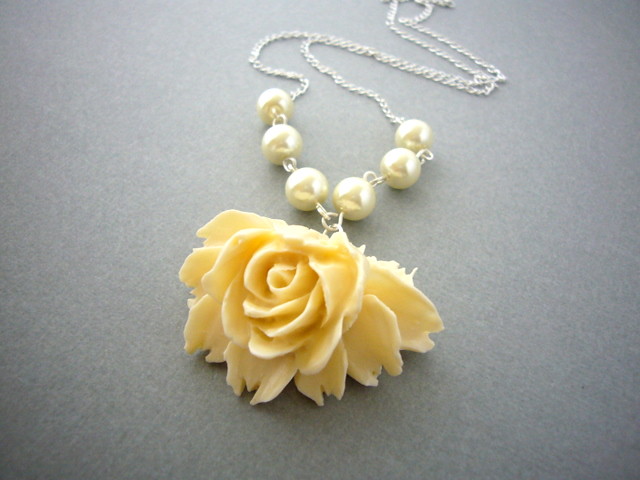
We’re almost finished, just a last step. Take the 4mm jump ring and open following the instructions above slide one side of the chain on it and then close it. Take the spring ring and open the attached jump ring and slide the other side of the chain on it and then close. Don't forget to finally add the large Rose Pendant in the middle of the Pearls. Now your Necklace is ready! Doesn’t it look beautiful?
I've already received a couple of messages from followers that are making their own sets, both decided to do the whole set in ivory as indicated in the instructions. Remember that you can contact me if you have any questions and also feel free to share your pictures when you finish your sets!
Also don't forget that Sunday is Mother's Day so make sure to enter the Mom Giveaway. You only have until tomorrow May 8th to enter. For details go to my Facebook Page.
Until Next Week!!!
So lets continue working on this beautiful set. We'll be making this Necklace now:
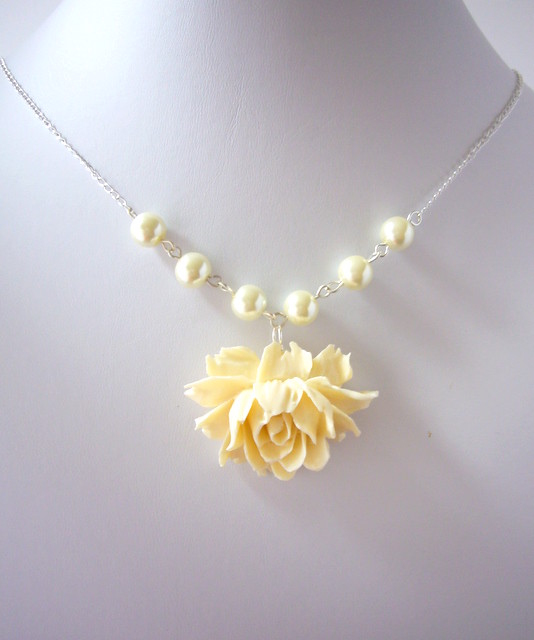
Finished Pearl and Flower Necklace
Take one Glass Pearl and slide it onto an Eye pin. Next we’ll do a simple loop into the remainder of the pin. Grab the eye pin and with the other hand use the round nose pliers. Place the pliers at the top of the pin; make sure you don’t use the biggest part of the pliers, since it will make your loop too big. Now begin rolling the wire towards the beads until the end of the wire meets the other end of the loop. If you didn’t calculate right you can cut the excess of the wire end keep rolling in, or re-try doing the loop.
Make a simple loop on an eye pin
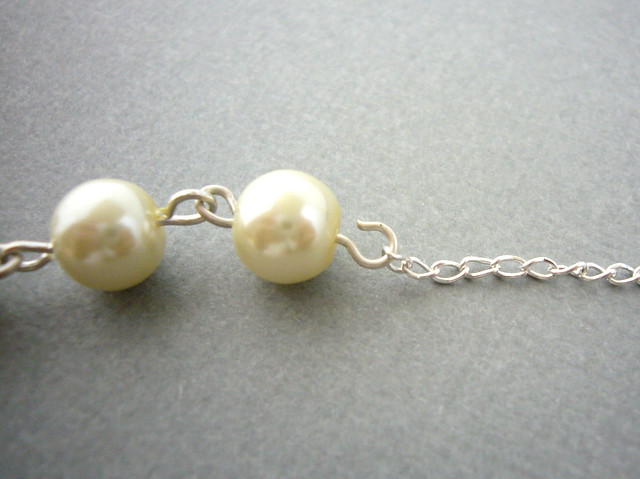
Now do the same with the remaining pearls and pins. Once you have the pearls on the eye pins attach one to the other and close the loops except for the two in the outside. Next cut the chain into equal parts and slide one chain on every side of the pearls and close the loops.
Link the pearls together
We’re almost finished, just a last step. Take the 4mm jump ring and open following the instructions above slide one side of the chain on it and then close it. Take the spring ring and open the attached jump ring and slide the other side of the chain on it and then close. Don't forget to finally add the large Rose Pendant in the middle of the Pearls. Now your Necklace is ready! Doesn’t it look beautiful?
Finished Bridesmaid Necklace
I normally recommend 18 inch necklaces in case you don't know what size to make it. It's the most standard used, but for skinnier smaller persons you can go with 16 inch or for bigger persons 20 or 22 inches. You can also add a small extender just to make sure. You can get them at any craft store or online.
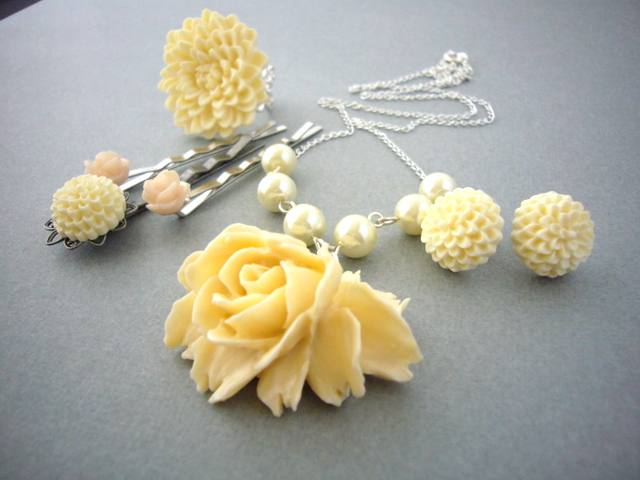
You have finished a complete set for your bridesmaids. You can choose to just make the Necklace and Ring, or the Bobby Pins and Necklace or any combination you want, or make the complete set. Your bridesmaids will be impressed with your skills.
Pearl and Flower Bridesmaid Jewelry Set
I've already received a couple of messages from followers that are making their own sets, both decided to do the whole set in ivory as indicated in the instructions. Remember that you can contact me if you have any questions and also feel free to share your pictures when you finish your sets!
Also don't forget that Sunday is Mother's Day so make sure to enter the Mom Giveaway. You only have until tomorrow May 8th to enter. For details go to my Facebook Page.
Until Next Week!!!
Labels:
accessories,
bridesmaids,
DIY,
flowers,
Handmade Jewelry,
pearls,
Tutorial
Saturday, April 30, 2011
Make Your Own Bridesmaid Flower Jewelry Set - Tutorial Part I
I've been wanting to post this tutorial for a while now, but I just can't find enough time to do everything I plan to. But as I promised last week, here it is. I've split it into 2 parts so that you have time to get the materials and know the basics before you finish your jewelry. This is a very romantic jewelry set and has like vintage look.
Here goes Part I.
Here goes Part I.
This Bridesmaid Jewelry Tutorial is perfect for the Bride who wants to do something special for her bridesmaids and now is the right timing since these flower sets are great for Spring/Summer. It is very easy to follow and you won’t need any prior jewelry making experience. If your planning to do only one or a few sets it will probably not be cost effective, but at least you can customize it and feel that you are crafting your own jewelry.
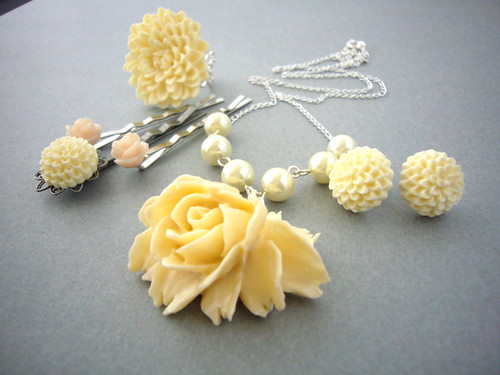
Finished Flower Jewelry Set by Estylo Jewelry
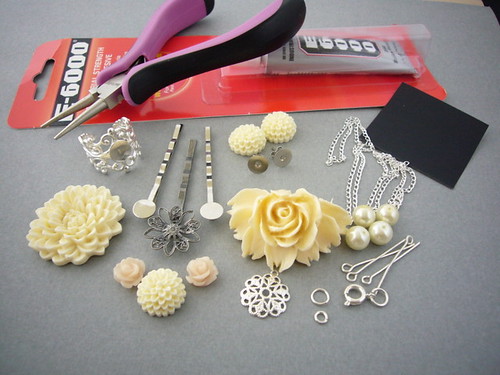
Here is the list of materials you will need for the full set of Earrings, Necklace, Ring and Bobby Pins. You might not find the Resin Flowers in a regular bead store, so I recommend that you buy them online. You can also contact me if you have trouble finding the materials. This list is if you want the whole set, but you can choose to make only part of it.
Material:
- 1 Resin Chrysanthemum Flower 32mm in Ivory Color for the Ring
- 1 Silver Filigree Adjustable Ring with pad
- 2 Resin Chrysanthemum Flowers 15mm in Ivory Color for the Earrings
- 2 Silver Ear Studs with Pad
- 1 Chrysanthemum Flowers 15mm in Ivory Color for the Filigree Bobby Pin
- 1 Silver Bobby Pin with Filigree Pad
- 2 Resin Rose Flowers 10mm in Ivory Color for the Bobby Pins
- 2 Silver Bobby Pins with Pad
- 1 Resin Rose Flower 43 x 35mm in Ivory color for the Necklace
- 1 Silver filigree pad 15mm for the Necklace
- 6 Ivory Glass Pearls 8mm for the Necklace
- 6 Silver Eye Pins ¾ or 1 inch for the Necklace
- 1 Silver Spring Clasp for the Necklace
- 1 Silver Jump Ring 7mm for the Necklace
- 1 Silver Jump Ring 4mm for the Necklace
- 1 Silver Chain size of your choice
- 1 Nose Pliers
- 1 Square of Sand paper
1 Glue E-6000 List of Materials needed
Now take the Large Flower for the Necklace and apply the glue on the Filigree. When you set the Rose make sure that you attach it on the upper part of the flower, so that the little ring can be seen from under the Rose. This is to attach a jump ring and then attach to the necklace.
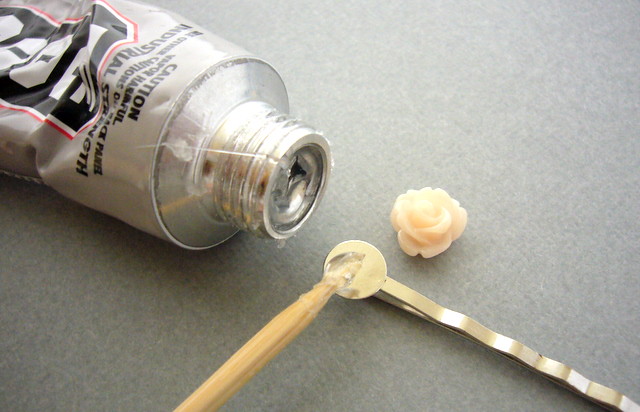
First we will start gluing all the flowers to their respective settings, since they have to dry at least 24 hours to be safe to handle. You might want to do this the day before or just do everything the same day and finish assembling the necklace the next day. Before you start gluing, take the sandpaper square and file the settings and the back of the flowers a little bit. That’s to leave them more even since some can have little bumps, it also allows the glue to hold better. Once you have filed them take a toothpick and get a small amount of the glue and apply on a Bobby Pin pad as shown in the picture.
Applying Glue to the Bobby Pin
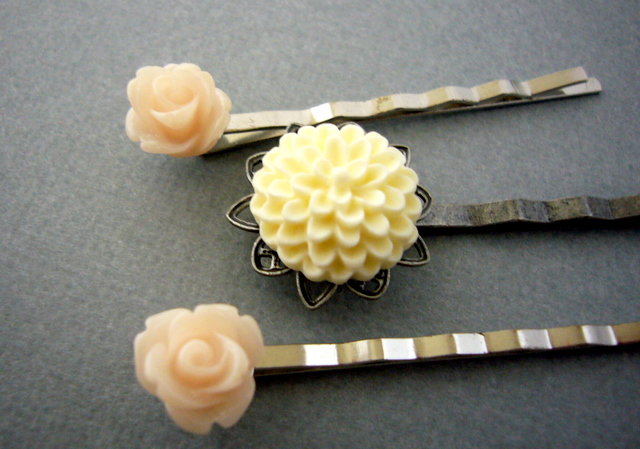
Take one rose flower and apply the glue as well, wait about two minutes and then press it on the Bobby pin. Make sure you have centered it correctly. You will have some minutes to move it a little around until it’s on the desired position. Then do the same with all the rest of the flowers and attach to their respective settings except for the Large Rose flower for the Necklace.
Glued Bobby Pins
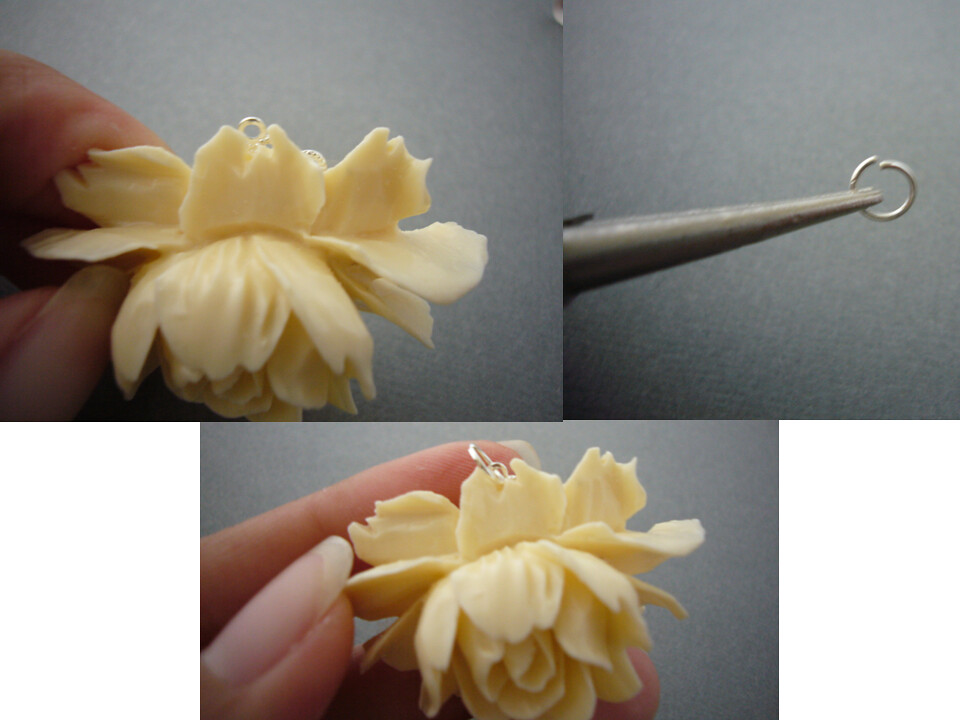
Now take the Large Flower for the Necklace and apply the glue on the Filigree. When you set the Rose make sure that you attach it on the upper part of the flower, so that the little ring can be seen from under the Rose. This is to attach a jump ring and then attach to the necklace.
Attaching the Rose for the Necklace
Now let everything dry for at least 24 hours. When it’s dry take the 7mm Jump ring and open it, to do that push one end forward and the other in the opposite direction. Never open it by pushing it to the sides. Attach the jump ring to the large Rose Pendant. You could now close it and hang on the chain as a simple necklace, which looks very beautiful by the way. But I want to complicate it a little more. However I will leave the rest of the tutorial for the next week, since I'm going to give you the time to get your supplies and start gluing all the flowers.
Simple Flower Pendant Necklace
In the next part of the tutorial I will explain you how to link the pearls together and make a necklace from unfinished chain. It's really not that complicate as it looks like, but you will probably have to practice a little bit to make the loops a similar size. (Go to Tutorial Part II)
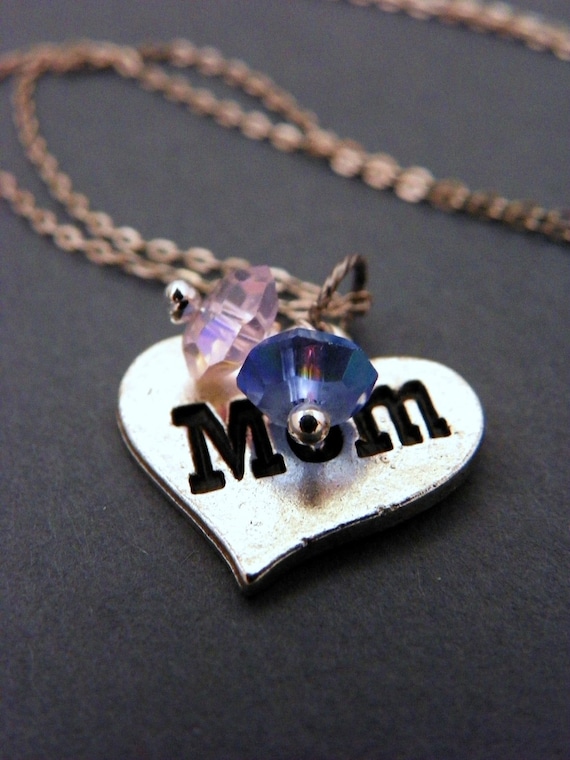
Before I leave you today I just want to remind you that there is a Mother's day Giveaway going on. To participate and have the chance to win the gorgeous necklace pictured below, just follow the instructions from Forty Toes Photography here.
Handmade Mom Necklace by Estylo Jewelry
Good luck everyone and will continue with the tutorial next week!
Labels:
Bridal,
Handmade Jewelry,
Swarovski,
Tutorial
Subscribe to:
Posts (Atom)