Handmade Jewelry for the Special Occasion

Monday, October 8, 2012

Fall Decoration Ideas


If you live in the northern hemisphere, summer is gone and fall has arrived! I live in the southern hemisphere so for me spring is starting.J But I want to dedicate this blog post to fall because I love this season. I like the weather, temperature begins to drop,  the leaves on the trees turn color, the smells… well, it’s a beautiful season!
A good way to start this season is decorating your home. It will make your home look warm and cozy. Let autumn come to your home!
I’ve been looking for some fall decoration ideas on pinterest and these are my findings. If you love fall like I do, and want to see more fall pictures, visit our pinterest board. J


They're all great ideas, I hope you liked the pictures!

Selene


Thursday, October 4, 2012

DIY Christmas Gifts - Lego Crayons

With only 12 weeks to go for Christmas, we decided that it would be great to have some guest bloggers sharing their ideas for DIY gifts. Every week we will be sharing one new tutorial from an invited guest. Expect to see lots of wonderful ideas!

We’ll be starting with my favorite one. Our guest blogger is Danielle from 2 Little Super Heroes and she will explain us step by step how to make colorful Lego Crayons! How great is that! Just an awesome idea to have your kids help you making the Christmas gifts and also enjoying them during hours of playtime!

Here is Danielle's tutorial:

"I am beyond thrilled to be featured! Thanks so much for asking me Sandra! I have a ridiculously easy and inexpensive gift to share with you for the little LEGO lover in your life. Take a look at these LEGO crayons! What kid wouldn't love these?

 
Photo here

 I purchased these LEGO molds on Amazon for $18.99 (they qualify for the Free Super Saver Shipping). I plan on using these for lots of different projects so it was a bit of an investment. But I think well worth it. You get both the LEGO mini-figurines and the LEGO blocks. And they are so cute!

Photo here

I bought 3 boxes of crayons (48 in each box) from the dollar store. Being such cheap crayons I wasn't sure if they would work, but I'm happy to say they did.

We peeled and peeled and peeled. It took awhile but I wrangled my mother in-law and 4-year-old to help out. It was actually kind of fun.


Photo here

Once the crayons are peeled break them into about 4 pieces each. For the block LEGO mold I put in 2 full crayons into each mold. For the mini-figurine mold I put in 1.5 crayons into each little man. I found this was the perfect amount.

Lego Mold
Photo here

Bake in the oven for 15 minutes at 350 F. Remove from the oven and cool on top of stove for about 10 minutes. Once cool enough to move place in the fridge to solidify. They easily slide out of the molds once they are fully hardened. We did have a few LEGO men lose their heads, but I just put the broken ones back in the molds and re-melted them back down.


Photo here

These would make an easy Christmas gift packaged with a LEGO coloring book. Or as a cute stocking stuffer.
You can find some of my other LEGO creations over at 2 Little Superheroes, I'd love for to stop by and say hi!"

Thanks so much Danielle for sharing this lovely idea! What a great way also to involve the kids in preparing some Christmas gifts. I bet they would have lots of fun making and using them.

A little bit about Danielle:
Danielle is the mom to two young boys and the wife to a not so handy hubby!  She  loves to sew, cook, craft, & decorate. Follow her along the way as she turns her house into a boy friendly home at 2 Little Superheroes, Facebook or Pinterest.
 

Monday, October 1, 2012

Always Wear Your Crown

Just a quick reminder for all the ladies – remember to always wear your invisible crown!

Photo here
Photo here
Photo here
Photo here
Have a great week!
Sandra.

Thursday, September 27, 2012

Quick and Easy Makeup!


Since I had my baby, I had to organize my time better and make things faster to spend more time with him. One of those things is makeup!  
You don’t need to spend hours putting on makeup to look good, if you are late for work or you are a busy woman or whatever the reason is you don’t have enough time for makeup,  in 5 minutes  you can have a fresh and radiant face.

Clean and moisturized face

The first thing you have to do is to rinse and moisturize your face, a clean and fresh face is the best way to start and you will keep your skin hydrated throughout the day.


Concealer

The second step is to apply concealer, it will help you cover imperfections on your skin and brighten your face.  Dot on areas such as under the eye, around the nose and on the chin, then blend with your  finger or a makeup sponge.


Foundation

Continue with a foundation, it will even out your skin tone and give you the appearance of a perfect skin. Take some foundation and blend along your skin and neck. 


Blush

Add some color to your face applying blush, I love it because it instantly turns your face from tired to fresh and healthy. Using a blush brush, smile and apply some blush on the apples of your cheeks and blend.


Eyes

The most important thing to look refreshed and awake is the eyes. Apply a neutral and soft eye shadow color, then curl your eyelashes to help it look longer and your eyes bigger, and finally apply mascara by wiggling the wand from the roots of your lashes on through to the ends.


Lips

Finally add a little shine on your lips by using a gloss, they are quick to apply and will help you  save some time.


And that’s it! You will look as if you have had 8 hours of uninterrupted sleep.  J


Selene


Monday, September 24, 2012

DIY Kid’s Bathroom Decor

It’s time for another DIY tutorial! A few weeks ago my daughter turned one year, so we had a little party and after the party we had left the decoration. We made an Uglydoll party, since she really likes one of their characters. I really thought it was going to be a waste if we just threw it away, given that we only had it on the walls for a few hours. After thinking a little about what to do I decided that the guest bathroom, which is now being used by her, should be really her bathroom and therefore it would be nice to change it a little bit. It is an old house and the bathroom furniture hasn’t been updated in years I’m sure, so they are just plain, white doors. Here is the before and after:

Estylo temp15

What you’ll need:

- Mod Podge

- Foam Brush

- Scissors

- Decor napkins, plastic tablecloth, etc. (whatever you have available)

- Polyurethane (optional for durability)

First, clean the surface you are going to work on. In my case it was the door of the bathroom furniture. You can sand it a little bit if you are planning to change the color, but in my case I just let it the ivory/white color it has. So just clean and let dry. Choose the items you want to attach to your door.

2012-09-06_17-48-29_310

Next step is to cut the figures that you want to use. I used some carton figurines and plastic wall decor. You can see in the picture how it looked and then I just cut the pieces that I was going to use.

2012-09-06_17-49-23_111

2012-09-06_17-54-28_339 

Go to your working surface and lay them out as you want your finished piece. Then with the foam brush gently apply the Mod Podge on your first decor item and place it where you want it to stay. Press it well to get all bubbles out. Do the same with all the rest of figurines.

Let dry for a few minutes and then brush Mod Podge on top of your decor. Make sure you cover them completely, including all the edges. Don’t worry it will dry completely clear. Let dry for a few minutes and then apply another thin coat.

100_1601

At this point you could add two coats of Polyurethane (let dry between coats) so it lasts longer. I chose not to cover it since it will be easy to remove if I decide to change the decor in a few months, but it’s up to you.

It takes no time and no money and it’s a very fun project that you could do together with your children if they are a bit older. You can use this process with hundreds of items. I used the napkins to cover my daughter’s toy box and am planning to also change an old coffee table into a kid’s table. So ideas are endless.

Anyone else has repurposed anything?

Have a great week!

Sandra.

Thursday, September 20, 2012

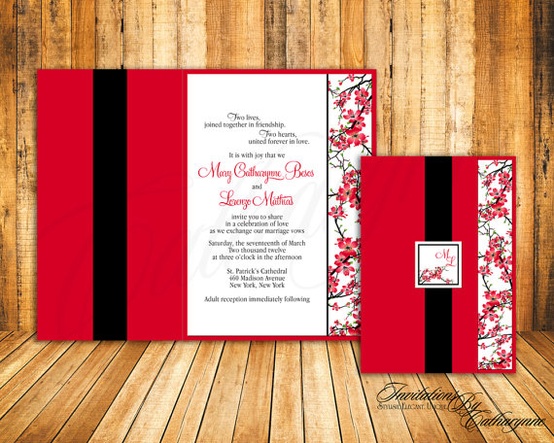
What Color is Your Wedding: Red Palette


This year is going by so fast, don’t you think? Fall starts tomorrow! It’s a beautiful season; I love hearing the leaves crunching under my feet, the crisp air and of course the beautiful colors!  So I decided to continue with a color according to this season: Red!

Here are some ideas for your red wedding. You can see more on my pinterest board.


Pearl and Swarovski Earrings available here

Red Shoes available here


Invitations available here


I hope you liked these red wedding ideas, definitely a beautiful wedding color! :)


Monday, September 17, 2012

Too much cuteness

As I was browsing on Pinterest I just found some of these pictures and thought they are just too cute and I had to share. They just look so gorgeous wearing mommy’s or daddy’s shoes. I remember how I loved to wear my mom’s shoes when I was a kid. Well, not only her shoes, also her jewelry, makeup….I just kept losing so many of her things. I know my daughter is probably going do that soon as well :)

Photo here
Photo here
Photo here
Photo here
Photo here
Photo here
Photo here
Photo here
Did you use to do the same when you were a kid?
Have a great week!
Sandra.

ShareThis

Related Posts with Thumbnails