Handmade Jewelry for the Special Occasion

Showing posts with label Tutorial. Show all posts

Monday, September 24, 2012

DIY Kid’s Bathroom Decor

It’s time for another DIY tutorial! A few weeks ago my daughter turned one year, so we had a little party and after the party we had left the decoration. We made an Uglydoll party, since she really likes one of their characters. I really thought it was going to be a waste if we just threw it away, given that we only had it on the walls for a few hours. After thinking a little about what to do I decided that the guest bathroom, which is now being used by her, should be really her bathroom and therefore it would be nice to change it a little bit. It is an old house and the bathroom furniture hasn’t been updated in years I’m sure, so they are just plain, white doors. Here is the before and after:

Estylo temp15

What you’ll need:

- Mod Podge

- Foam Brush

- Scissors

- Decor napkins, plastic tablecloth, etc. (whatever you have available)

- Polyurethane (optional for durability)

First, clean the surface you are going to work on. In my case it was the door of the bathroom furniture. You can sand it a little bit if you are planning to change the color, but in my case I just let it the ivory/white color it has. So just clean and let dry. Choose the items you want to attach to your door.

2012-09-06_17-48-29_310

Next step is to cut the figures that you want to use. I used some carton figurines and plastic wall decor. You can see in the picture how it looked and then I just cut the pieces that I was going to use.

2012-09-06_17-49-23_111

2012-09-06_17-54-28_339 

Go to your working surface and lay them out as you want your finished piece. Then with the foam brush gently apply the Mod Podge on your first decor item and place it where you want it to stay. Press it well to get all bubbles out. Do the same with all the rest of figurines.

Let dry for a few minutes and then brush Mod Podge on top of your decor. Make sure you cover them completely, including all the edges. Don’t worry it will dry completely clear. Let dry for a few minutes and then apply another thin coat.

100_1601

At this point you could add two coats of Polyurethane (let dry between coats) so it lasts longer. I chose not to cover it since it will be easy to remove if I decide to change the decor in a few months, but it’s up to you.

It takes no time and no money and it’s a very fun project that you could do together with your children if they are a bit older. You can use this process with hundreds of items. I used the napkins to cover my daughter’s toy box and am planning to also change an old coffee table into a kid’s table. So ideas are endless.

Anyone else has repurposed anything?

Have a great week!

Sandra.

Tuesday, July 12, 2011

Flower Headband or Clip DIY Tutorial

As I had mentioned to my Facebook Fans I recently learned how to do these gorgeous Flower Hair Accessories and just got addicted to it. The are great for Newborns, Brides, Bridesmaids, or just the every day outfit! I made a bunch for me and my little baby that will be born in a few weeks, but I just made way too many, so I decided to 1. Show you how to make yours and 2. Have a fun giveaway with some of the flowers I already finished, plus jewelry and cufflinks:


I'll start with the tutorial and will write about the Giveaway in another post, since it's not only the flowers that I'm giving away, but also some of my jewelry pieces and cufflinks in celebration of getting to 2,000 Facebook Fans! Yayyy!!! So make sure to check out the Giveaway post here.

Back to the Flower Accessories. This is how your finished Flower will look like:


In the tutorial I will show you how to attach the flowers to an elastic headband, but you can attach them also to Bobby Pins, Hair Clips, Belts, etc. Just use your imagination and the options are endless. They are also great for all ages and occasions. So here is what you will need:
- Scissors
- Fabric Flowers
- Heat Gun
- Felt
- Rhinestone or Button if you want to decorate the center
- Headband, Pin, Clip, or whatever you want to attach it to

You can get all of these items at a regular Craft Store, like Michael's or Jo-Anns. They also a have a large selection of flowers and normally will have a few on discount. Another option is to go to the Dollar Store, however the selection is probably a little smaller. Start by cutting two small circles from the felt. They should be the same size, but don't need to be exact. Set them aside.


Next cut the elastic for your headband. You can buy the headbands ready or you can make your own. I opted to get the elastic since I wanted to make the headbands in different sizes, for me and my girl. The suggested sizes are as follow:
Newborn - 13"
3 Mo to 6 Mo - 14"
6 Mo to 12 Mo - 16"
12 Mo to Teen - 17.5"
Adult - 18"
Those are the finished sizes, so if you are making your own headband you will want to cut your elastic a little more than that. Once you cut your elastic you need to sew them together. Don't worry on how it looks since it will be covered by the felt. Just make sure it's sewn correctly so it won't rip.


Set the headband aside and connect your heat gun so it starts warming up, then continue onto the flowers. Take one flower completely apart, depending on how filled you want them you can use more than one. I like them with a lot of petals so I usually use at least two flowers. If you plan to use a rhinestone or button in the center you can throw away everything except for the petals. Or you can leave aside the center of the flower and re-use on yours.


Now that you have the petals only arrange them in the way you want to have them. You can mix different flowers, colors or just put them together as they were originally. I like to separate them by size first and then start to put them together until it looks like I want them. Once you've arranged them turn them around to have the largest petals on the top and the smallest on the bottom. Take your first petal (largest) and add some of the glue with heat gun on it. Now take the next petal and press firmly over the first one. Keep doing that with the rest of your petals until you're finished.


Now it's the time to embellish your flower. You can use rhinestones, pearls, buttons or the original center of the flower. You can get a mixed package of colors and sizes of rhinestone in the bead section of your craft store or you can use the self-adhesive ones from the scrapbooking area. Just apply the glue with the heat gun onto the center of the flower and press your embellishment on it. If you don't want to add anything, just leave it as is and it will look nice anyway.


You've finished your flower now and are almost ready. Take on of the felt circles and apply glue all over it. Also apply some glue on the back of your flower (the largest petal) and press both of them together. This is to hide any imperfection that might be on it. Now take your headband and apply glue on the part that is going to be glued onto the felt, make sure you are hiding the sewed part. Press it onto the flower and then apply glue on the inner side of the headband and of the two felt pieces. Glue them together and let dry.


That's it! You have finished your Flower Headband! So easy, right? And it will take you only a few minutes to make them. You can make it as fancy or as simple as you want and I love that it's great for any age and any occasion. Remember that I do not sell these flowers in my shop, just made them for fun and will be giving a few away (together with jewelry and cufflinks) on my 2,000 Facebook Fan celebration here!


If you're not the crafty kind of person but liked these flowers and did not win one at my giveaway, you can find plenty of fancy options for sale from other Handmade Artists. Here are a few that I found:
 
For the Bride
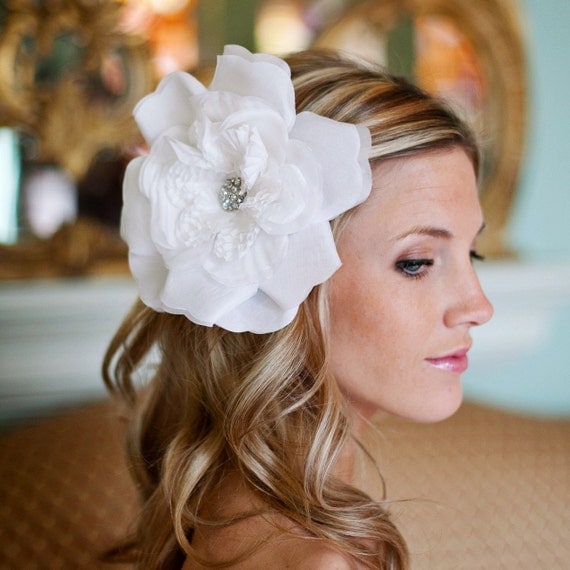
Handmade Bridal Flower Clip here

Shoe Clip
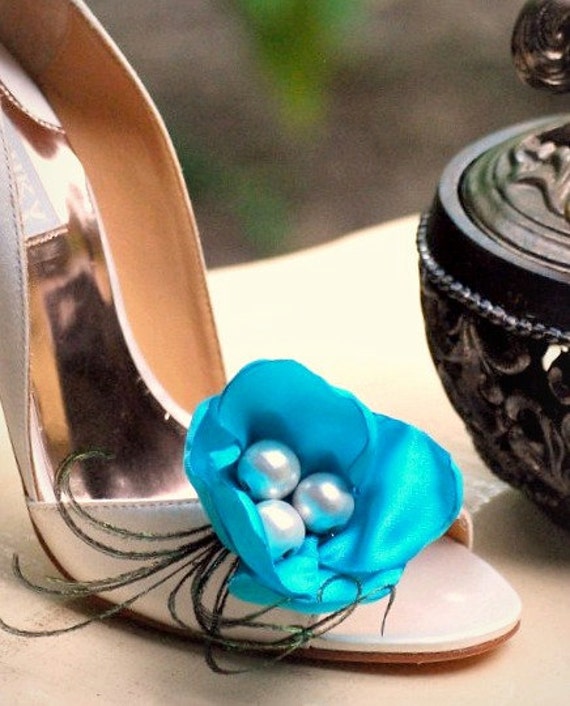
 Handmade Peacock Shoe Clip here

For the Bridesmaid
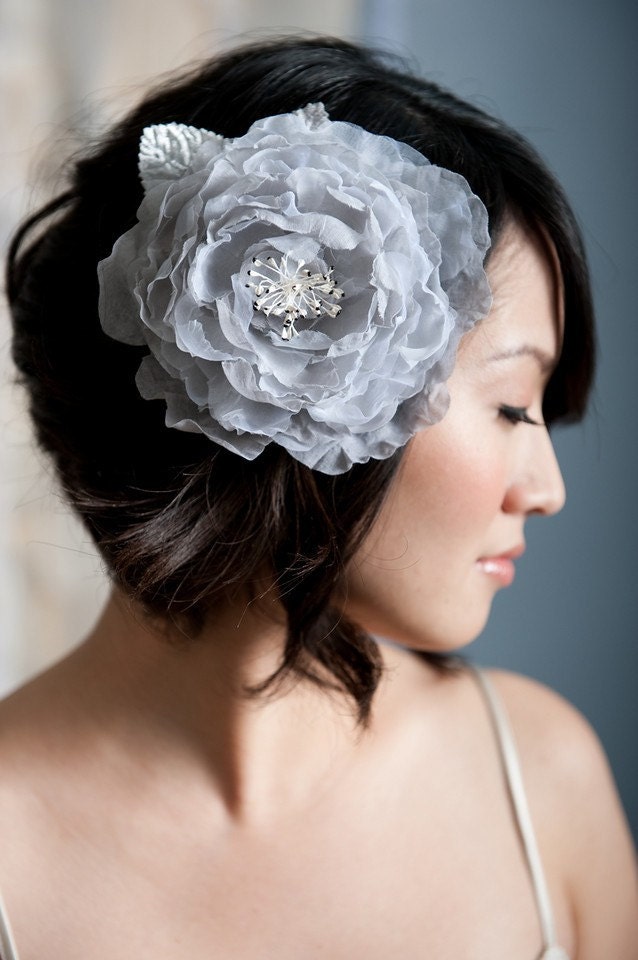
  Handmade Flower clip here 
For the Baby
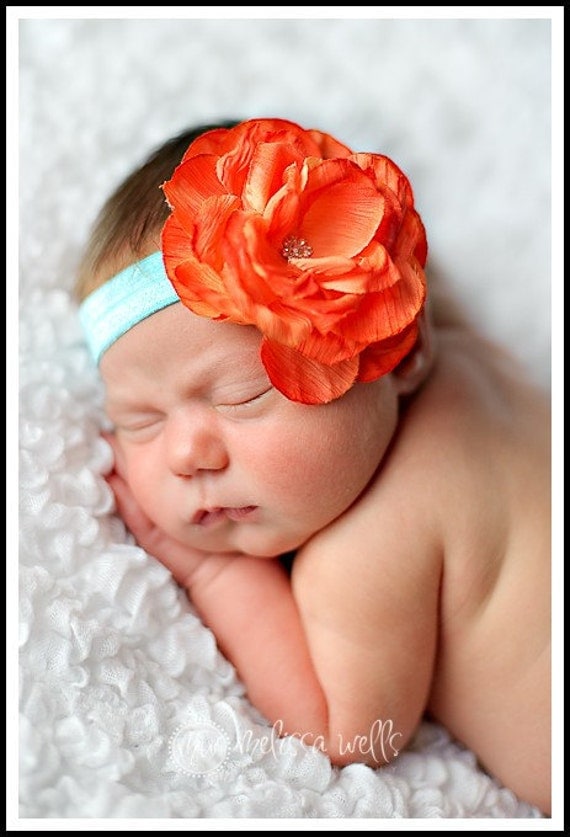
Handmade Newborn Headband here

Flower Sash

Handmade Flower Sash here 

Have Fun creating or shopping and don't forget to check out the 2,000 Facebook Fan Giveaway!

Wednesday, June 15, 2011

Bridal Earrings Tutorial - Pearl in a Silver Cage DIY

It's time for another Tutorial! But before I show you how to do those cute wire cages and then convert them into the Bridal Earrings you can see below I want to remind you that the Father's Day Giveaway is still going on! You have 2 more days to enter it, so don't waste the chance to win any set of Cufflinks from my Cufflink Shop. To enter the Giveaway just go here.

Ok, now to the Tutorial. What I'm going to show you is not only to assemble these beautiful pearl and crystal earrings but also how to make your own Wire Cages. Of course you could just go to a store and probably buy them there, but it's a lot more fun if you make them yourself. Also keep in mind that once you learn how to do them you can make different sizes, colors/metal, textures, etc.

Finished Pearl in a Cage Bridal Earrings

What you need:
- 22 Gauge Sterling Silver (or other metal if you want) Wire. Around 18 inches should be enough.
- 2 Ivory Pearls size 8mm.
- 2 Round Swarovski Crystals in color Clear AB size 6mm.
- 1 Pair of fancy Sterling Silver Ear Post or the ear wire of your choice.
- Round Nose Pliers.
- Flush Cutters.
- Flat Nosed Pliers.

You should be able to get all of those (except the exact ear posts) at any supply store. For regular ear wires you wont have any problem finding them at the supply store as well. For more fancy ones I recommend you order them online or go to a specialized bead store.

Tools and Material Needed for the Earrings

Once you have all your material and tools together take your wire and measure approx. 7 1/2 inches of it and cut it with your flush cutters. Then do the same one more time. That's the wire you will be using for your cages. Take one piece of the cut wire and with your round nose pliers make a simple loop. To do that place the pliers at the end of the wire and start rolling in. Make a complete circle.

Start with a simple loop on your wire

Now switch pliers and grab the flat nosed pliers. Place them on the circle that you just made and start rolling it, forming a larger circle around it, like shown in the picture below. You don't have to do it as tight as I made it, but I like having the beads with lots of wire around. Continue doing it until you get half way through the wire.

With Flat Nosed Pliers start making circles

Once you get to the middle of the wire do exactly the same with the other end of the wire until both circles meet. See picture below. Now take one of the circles and turn it to the other side forming an "S" shape as you can see in the picture and place your bead on top of it. Make sure that your circles are big enough to cover the pearl.

Make same size circles on both sides of the wire and place the pearl on top

Now start covering the pearl with the wire. Try to stretch them a little apart. Remember that they don't need to be perfect. Just keep stretching with your fingers and don't worry, it won't deform, the wire is pretty sturdy. You can use your pliers if you feel you need it, but I prefer to do it with the fingers and have more control on how separate I want the wire. Once you've covered the pearl and are happy with how it looks take your pliers and pull up the first loop you had made on each sides of the wire. Those will be the hooks to attach to the ear posts and crystals.


Cover the pearl with the Wire and form the hooks on top and bottom

You have now completed the most important part of the earrings. You could actually stop here and just hang those pearl cages to the ear post and they would look nice. But I really like the sparkle of the crystals, so I decided to add them at the bottom. Take the remainder of your wire and slide one of the crystals onto it. Make a tiny simple loop at the end of the wire. Remember how we did the simple loop, right? At the other side of the wire you will cut it off with your flush cutters, leaving a bit of wire showing out of the crystal. Now make a simple loop there as well.

Make simple loops on the crystal

Remember that the second loop should be larger than the first one, since this is the one who will serve as hook to be attached on the wire cage. Now do the same with your remaining wire and the other swarovski crystal. Once finished grab your crystal and open the larger loop, attach it to the silver cage and close the loop again.

Attach the Swarovski Crystal to the Pearl Cage

You now have the bottom part of your earrings. Grab the unattached side of the cage and open up the loop. Attach it to your ear post and close the loop again. Do exactly the same with the other cage and ear post. That's it! You have completed a gorgeous pair of earrings! Now that you've learned how to do the cages you can let flow your imagination and do different things, like the wine charms in the picture below. Or maybe make a matching necklace? These earrings also make a great gift for your bridesmaids and you can play with the colors you chose for your wedding.
 
Use your imagination for different designs

I hope you found this tutorial easy to follow and you like the outcome. Remember that it can take some time and practice until you get even cages, but just keep trying and I'm sure they will look gorgeous. As usual, if you have questions just send me a message and if you want to share with everyone your new creation, feel free to post pictures on my Facebook Page. I love to get messages from my readers, so don't be shy :)

Also good luck to everyone who has entered my Father's Day Cufflinks Giveaway! I will announce the winner on Friday June 17th. and you have still time to enter until Thursay at 11:59pm, so hurry and enter here.

Saturday, May 7, 2011

Make Your Own Bridesmaid Flower Jewelry Set - Tutorial Part II

Last week I posted Part I of the Bridesmaid Jewelry Tutorial. I hope you had enough time to get your supplies and start gluing the flowers. Remember that the flowers need to dry at least 24 hours in order to set well. Also be careful when handling the E6000 glue since it has a very strong smell and can be toxic. So make sure you always work on a well ventilated area and read the instructions on the tube before opening.

So lets continue working on this beautiful set. We'll be making this Necklace now:

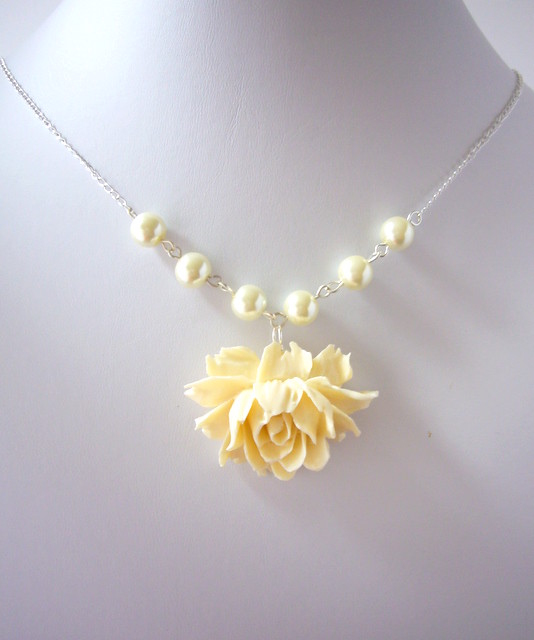
 Finished Pearl and Flower Necklace

Take one Glass Pearl and slide it onto an Eye pin. Next we’ll do a simple loop into the remainder of the pin. Grab the eye pin and with the other hand use the round nose pliers. Place the pliers at the top of the pin; make sure you don’t use the biggest part of the pliers, since it will make your loop too big. Now begin rolling the wire towards the beads until the end of the wire meets the other end of the loop. If you didn’t calculate right you can cut the excess of the wire end keep rolling in, or re-try doing the loop.

Make a simple loop on an eye pin

Now do the same with the remaining pearls and pins. Once you have the pearls on the eye pins attach one to the other and close the loops except for the two in the outside. Next cut the chain into equal parts and slide one chain on every side of the pearls and close the loops.

Link the pearls together

We’re almost finished, just a last step. Take the 4mm jump ring and open following the instructions above slide one side of the chain on it and then close it. Take the spring ring and open the attached jump ring and slide the other side of the chain on it and then close. Don't forget to finally add the large Rose Pendant in the middle of the Pearls. Now your Necklace is ready! Doesn’t it look beautiful?

Finished Bridesmaid Necklace

I normally recommend 18 inch necklaces in case you don't know what size to make it. It's the most standard used, but for skinnier smaller persons you can go with 16 inch or for bigger persons 20 or 22 inches. You can also add a small extender just to make sure. You can get them at any craft store or online. 

You have finished a complete set for your bridesmaids. You can choose to just make the Necklace and Ring, or the Bobby Pins and Necklace or any combination you want, or make the complete set. Your bridesmaids will be impressed with your skills.

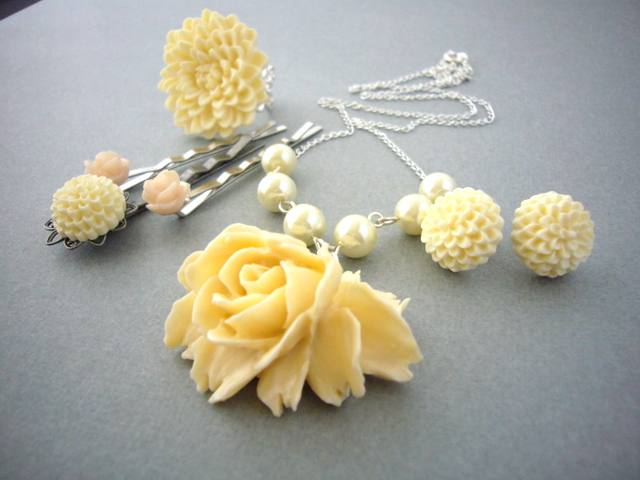
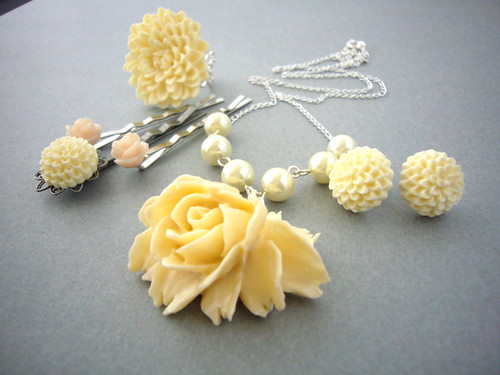
 Pearl and Flower Bridesmaid Jewelry Set

I've already received a couple of messages from followers that are making their own sets, both decided to do the whole set in ivory as indicated in the instructions. Remember that you can contact me if you have any questions and also feel free to share your pictures when you finish your sets!

Also don't forget that Sunday is Mother's Day so make sure to enter the Mom Giveaway. You only have until tomorrow May 8th to enter. For details go to my Facebook Page.

Until Next Week!!!

Saturday, April 30, 2011

Make Your Own Bridesmaid Flower Jewelry Set - Tutorial Part I

I've been wanting to post this tutorial for a while now, but I just can't find enough time to do everything I plan to. But as I promised last week, here it is. I've split it into 2 parts so that you have time to get the materials and know the basics before you finish your jewelry. This is a very romantic jewelry set and has like vintage look.

Here goes Part I.

This Bridesmaid Jewelry Tutorial is perfect for the Bride who wants to do something special for her bridesmaids and now is the right timing since these flower sets are great for Spring/Summer. It is very easy to follow and you won’t need any prior jewelry making experience.  If your planning to do only one or a few sets it will probably not be cost effective, but at least you can customize it and feel that you are crafting your own jewelry.

 Finished Flower Jewelry Set by Estylo Jewelry

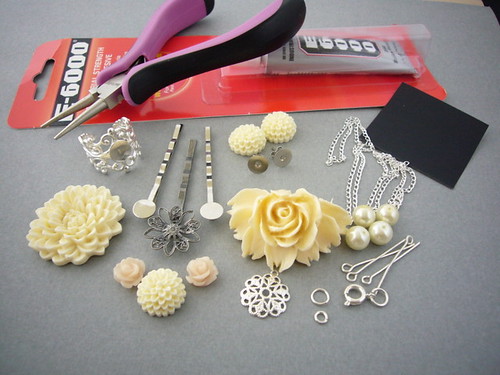
Here is the list of materials you will need for the full set of Earrings, Necklace, Ring and Bobby Pins. You might not find the Resin Flowers in a regular bead store, so I recommend that you buy them online. You can also contact me if you have trouble finding the materials. This list is if you want the whole set, but you can choose to make only part of it.

Material:
-          1 Resin Chrysanthemum Flower 32mm in Ivory Color for the Ring
-          1 Silver Filigree Adjustable Ring with pad
-          2 Resin Chrysanthemum Flowers 15mm in Ivory Color for the Earrings
-          2 Silver Ear Studs with Pad
-          1 Chrysanthemum Flowers 15mm in Ivory Color for the Filigree Bobby Pin
-          1 Silver Bobby Pin with Filigree Pad
-          2 Resin Rose Flowers 10mm in Ivory Color for the Bobby Pins
-          2 Silver Bobby Pins with Pad
-          1 Resin Rose Flower 43 x 35mm in Ivory color for the Necklace
-          1 Silver filigree pad 15mm for the Necklace
-          6 Ivory Glass Pearls 8mm for the Necklace
-          6 Silver Eye Pins ¾ or 1 inch for the Necklace
-          1 Silver Spring Clasp for the Necklace
-          1 Silver Jump Ring 7mm for the Necklace
-          1 Silver Jump Ring 4mm for the Necklace
-          1 Silver Chain size of your choice
-          1 Nose Pliers
-          1 Square of Sand paper
1 Glue E-6000

 List of Materials needed

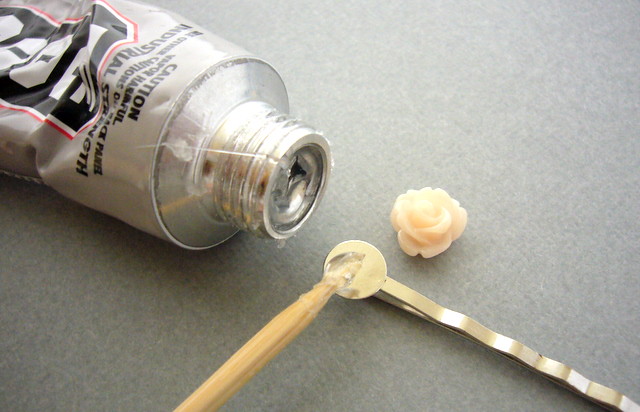
First we will start gluing all the flowers to their respective settings, since they have to dry at least 24 hours to be safe to handle. You might want to do this the day before or just do everything the same day and finish assembling the necklace the next day. Before you start gluing, take the sandpaper square and file the settings and the back of the flowers a little bit. That’s to leave them more even since some can have little bumps, it also allows the glue to hold better. Once you have filed them take a toothpick and get a small amount of the glue and apply on a Bobby Pin pad as shown in the picture.

 Applying Glue to the Bobby Pin

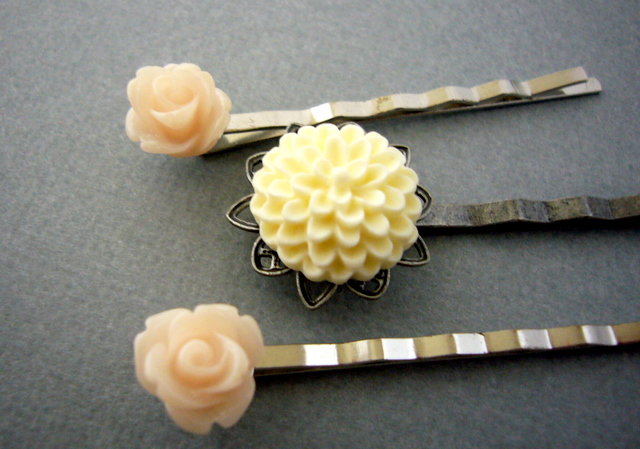
Take one rose flower and apply the glue as well, wait about two minutes and then press it on the Bobby pin. Make sure you have centered it correctly. You will have some minutes to move it a little around until it’s on the desired position. Then do the same with all the rest of the flowers and attach to their respective settings except for the Large Rose flower for the Necklace. 

Glued Bobby Pins

Now take the Large Flower for the Necklace and apply the glue on the Filigree. When you set the Rose make sure that you attach it on the upper part of the flower, so that the little ring can be seen from under the Rose. This is to attach a jump ring and then attach to the necklace.

 Attaching the Rose for the Necklace

Now let everything dry for at least 24 hours. When it’s dry take the 7mm Jump ring and open it, to do that push one end forward and the other in the opposite direction. Never open it by pushing it to the sides. Attach the jump ring to the large Rose Pendant. You could now close it and hang on the chain as a simple necklace, which looks very beautiful by the way. But I want to complicate it a little more. However I will leave the rest of the tutorial for the next week, since I'm going to give you the time to get your supplies and start gluing all the flowers.
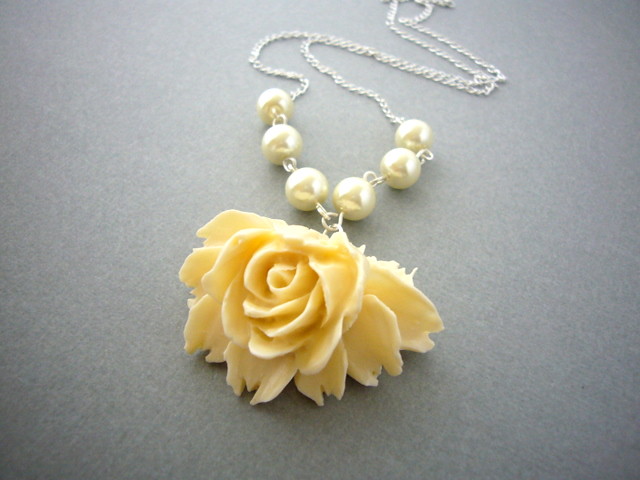
 Simple Flower Pendant Necklace
In the next part of the tutorial I will explain you how to link the pearls together and make a necklace from unfinished chain. It's really not that complicate as it looks like, but you will probably have to practice a little bit to make the loops a similar size. (Go to Tutorial Part II)
Before I leave you today I just want to remind you that there is a Mother's day Giveaway going on. To participate and have the chance to win the gorgeous necklace pictured below, just follow the instructions from Forty Toes Photography here.
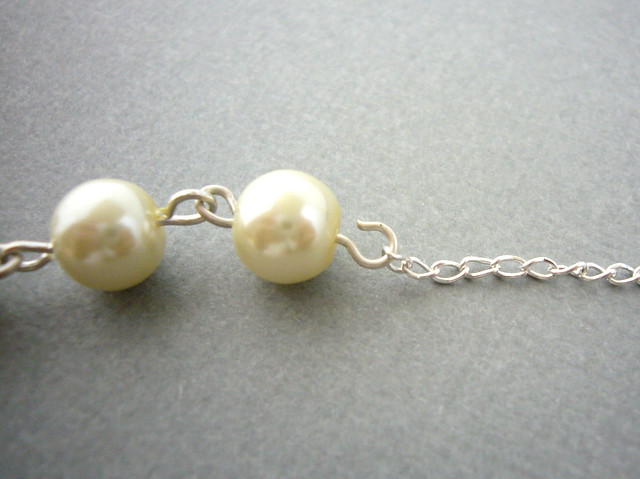
Handmade Mom Necklace by Estylo Jewelry

Good luck everyone and will continue with the tutorial next week!
 

ShareThis

Related Posts with Thumbnails